Start working by creating a new file (File>New), having 1600x1200 px and 72 dpi.
Then select the Rectangle Tool (U) to draw the background of the picture we want to get.
Choose the next shown parameters for the first made layer by making a mouse click on the processed layer on the layers’ palette.
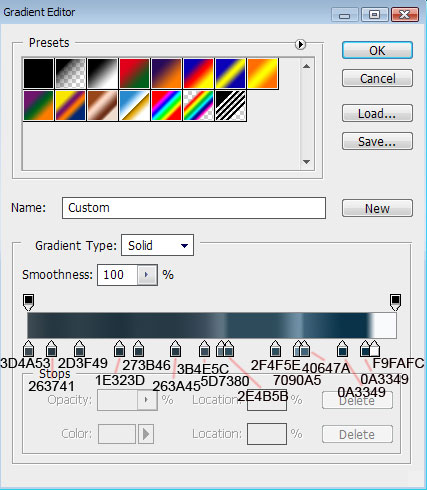
Blending Options>Gradient Overlay
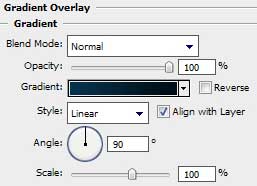
Gradient’s parameters:

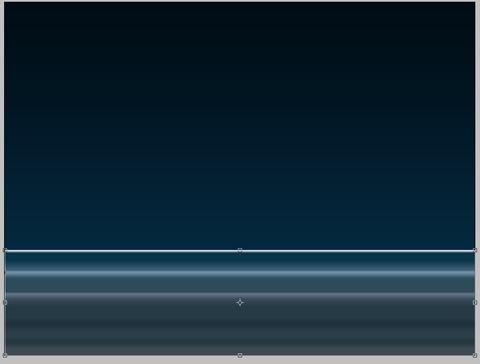
Use the same tool to represent the main basis for the picture’s elements which will be adjusted later:

The layer’s parameters: Fill 0%
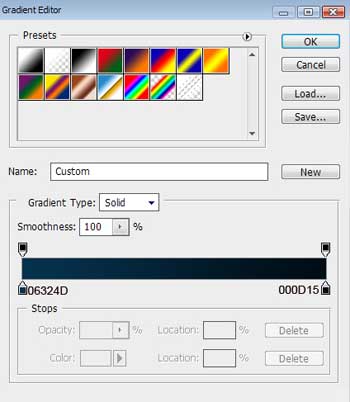
Blending Options>Gradient Overlay
Gradient’s parameters:

Using the Free Transform selection, we must narrow down by vertical position the same layer till getting 30 degrees.
Create a new layer. Mark it out, so mark the previous layer and press CTRL+E. Next we shall rotate the canvas (Image>Rotate Canvas>90 CW) and only after that the Free Transform option will be used for situating the layer on the central part of the picture.

The same layer should get the next option: Filter>Distort>Shear
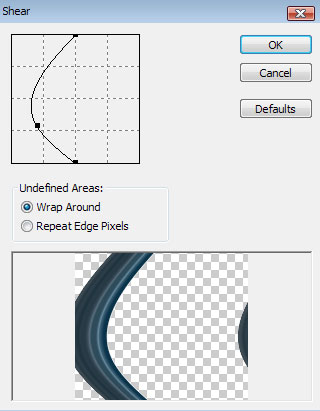
Rotate back the canvas (Image>Rotate Canvas>90 CCW).

Next we shall apply the next brightness’ parameters for the changed layer (Image>Adjustment>Levels)


Use the Free Transform option to change the bitmap layer as the next picture indicates it:

Next we shall apply a new instrument – the Pen Tool (P)
Pen Tool (P).
 allows you to make lines that change colour and shapes on the project.'); return false">Pen Tool (P) to represent several white rays.


Each layer containing the rays has the same parameters: Blending Options>Outer Glow


Make a mouse click on the bottom part of the layers’ palette on Create new fill or adjustment layer>Hue/Saturation


Make a mouse click on the same layer on Add a Mask option that is situated on the bottom part of the layers’ palette too. Select then the Brush Tool (B)
Brush Tool (B).
 The brush tool is used for making good backgrounds and also on new layers they have different types so that you get a different effect with every brush you use.'); return false">Brush Tool (B) of black color to clean out that part of the picture situated above the ornament:

Make a mouse click on the bottom part of the layers’ palette on Create new fill or adjustment layer>Levels


Next we have to make a mouse click on Add a Mask option on the bottom part of the layers’ palette, as we did earlier and apply the Brush Tool (B)
Brush Tool (B).
The brush tool is used for making good backgrounds and also on new layers they have different types so that you get a different effect with every brush you use.'); return false">Brush Tool (B) of black color to clean out that picture’s part situated above the ornament:
Take now the Ellipse Tool (U)
Ellipse Tool (U).
 Use the ellipse tool to draw ovals and circles. To draw a circle, hold down the Shift key while dragging. Double-click the ellipse tool to open the Color inspector.'); return false">Ellipse Tool (U) to draw a small circle’s figure:
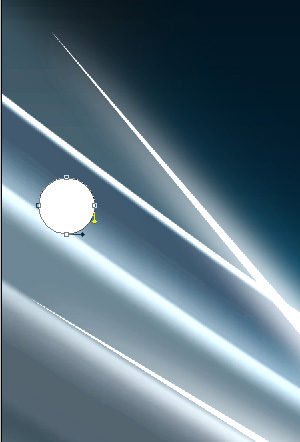
The layer’s parameters: Blending Options>Outer Glow

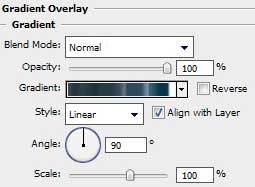
Blending Options>Gradient Overlay

Gradient’s parameters:


Use the same instrument to represent another small circle:

The layer’s parameters: Fill 0%
Blending Options>Outer Glow

Blending Options>Color Overlay


Select once again the Ellipse Tool (U) for drawing another small circle:

The layer’s parameters: Fill 0%
Blending Options>Outer Glow

Blending Options>Color Overlay


Make many copies of the layers containing the circles and then select the Free Transform option to change the copies’ sizes. We should also pay attention to Opacity option and if necessary it should be changed in the selection of the layers’ parameters:

Create a new layer on which we shall apply the Brush Tool (B)
Brush Tool (B).
The brush tool is used for making good backgrounds and also on new layers they have different types so that you get a different effect with every brush you use.'); return false">Brush Tool (B) of white color, to represent a kind of train made of small fires.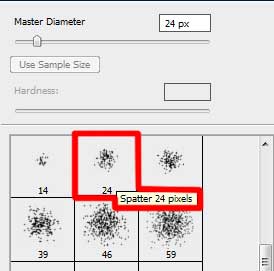
Select the next shown parameters for the brush:


The layer’s parameters: Blending Options>Outer Glow


Changing the brush’s diameter, it’s possible to represent on a different layer (Create new layer) several more small fires, having the layer’s parameters the same with the previous one:

Representing the picture came to end!

Không có nhận xét nào:
Đăng nhận xét