Creative christmas cards - part 1
Create a new file (File>New) that would have 1280x1024 px and 72 dpi.
Now we shall use the Rectangle Tool (U) to draw the background of the picture to be.

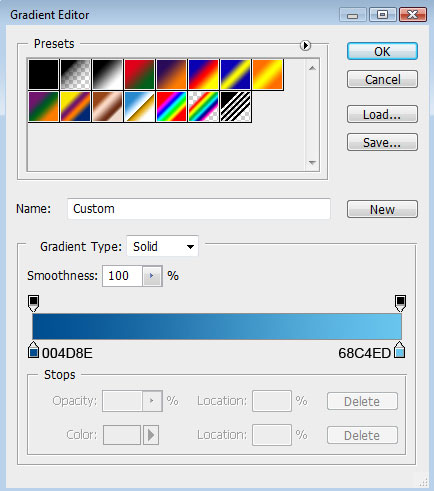
Set the next parameters for the made layer by making a mouse click on this layer on the layers’ palette.
Blending Options>Gradient Overlay
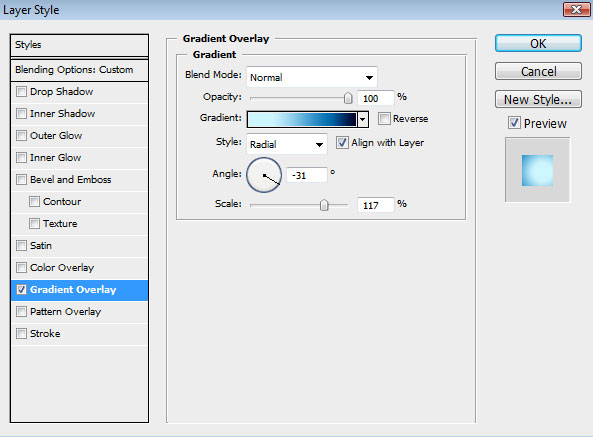
Gradient’s parameters:

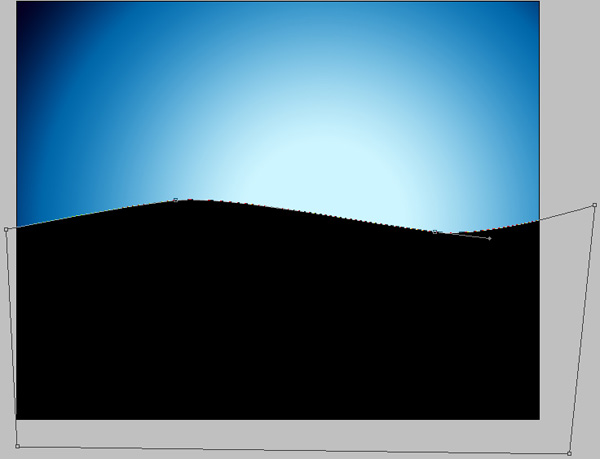
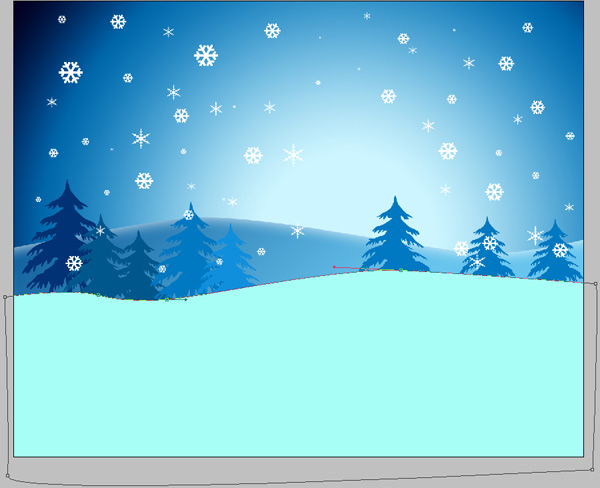
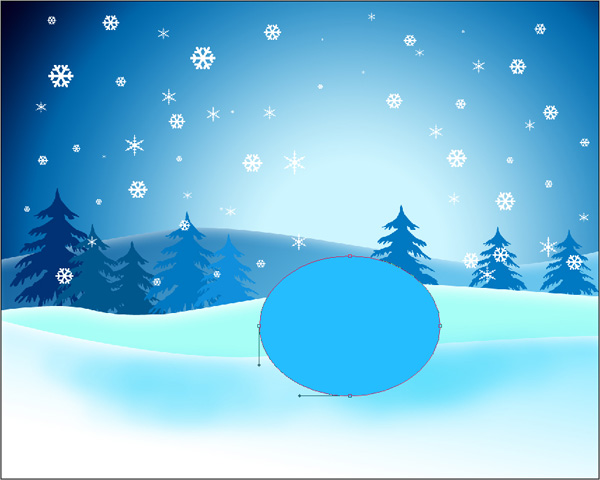
Next we’ll represent the snow hills, applying the Pen Tool (P)
Pen Tool (P).
 allows you to make lines that change colour and shapes on the project.'); return false">Pen Tool (P) and Convert Point Tool for the corrections on the made elements.
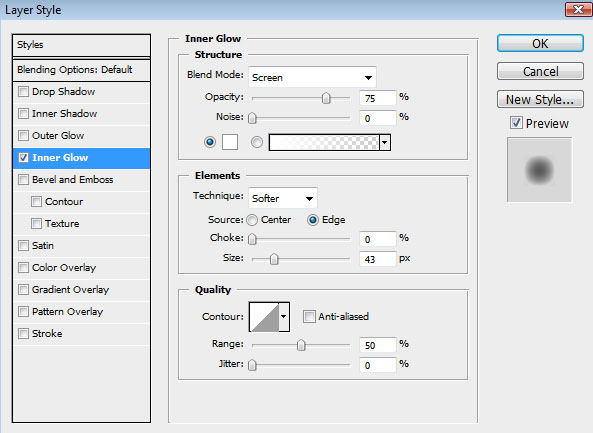
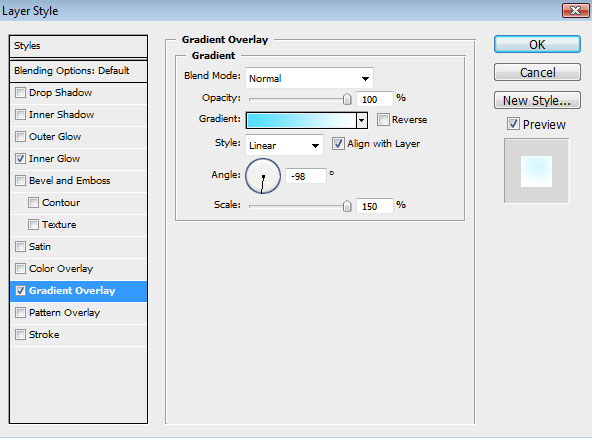
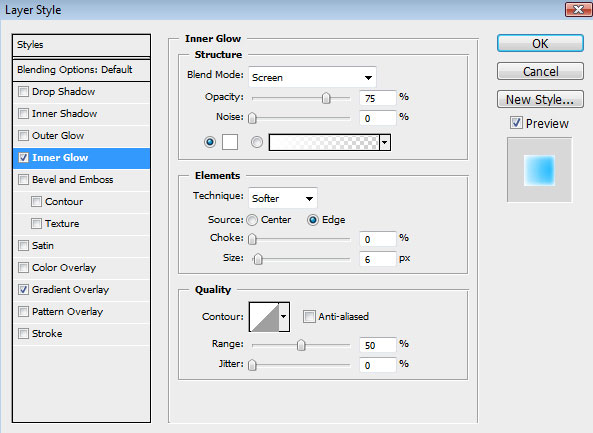
The layer’s parameters: Blending Options>Inner Glow

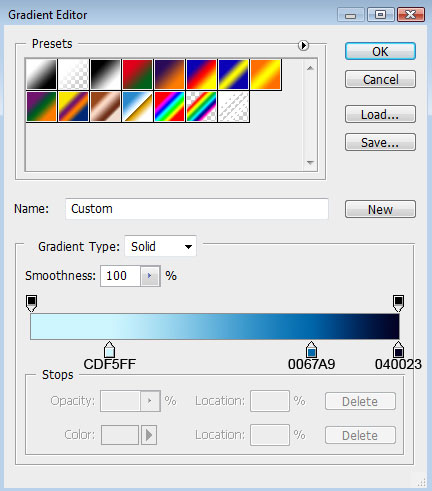
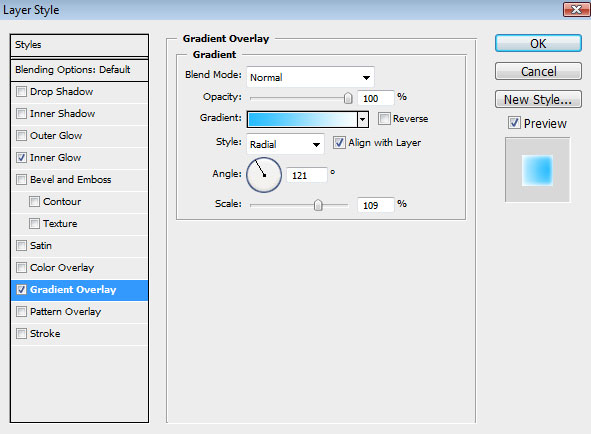
Blending Options>Gradient Overlay
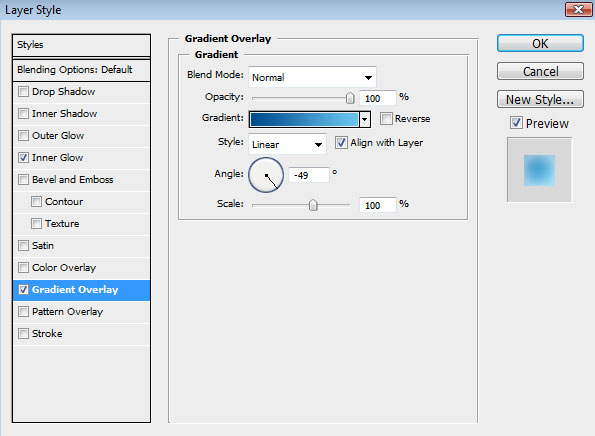
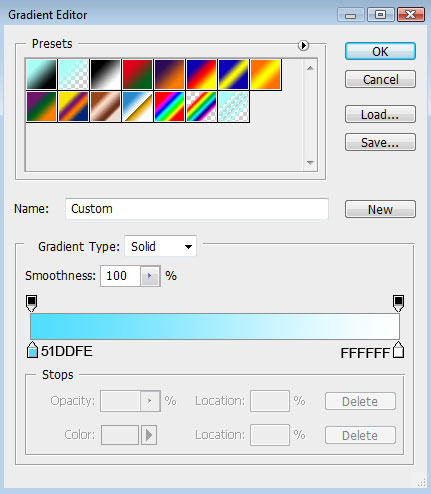
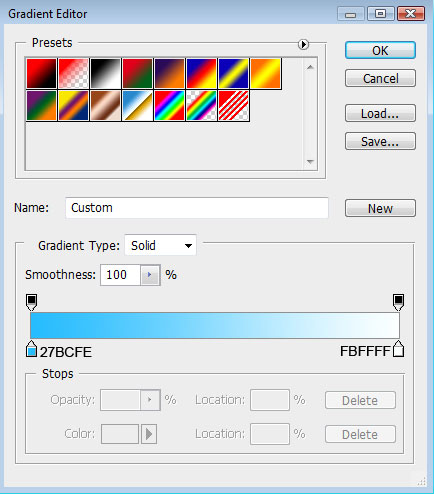
Gradient’s parameters:

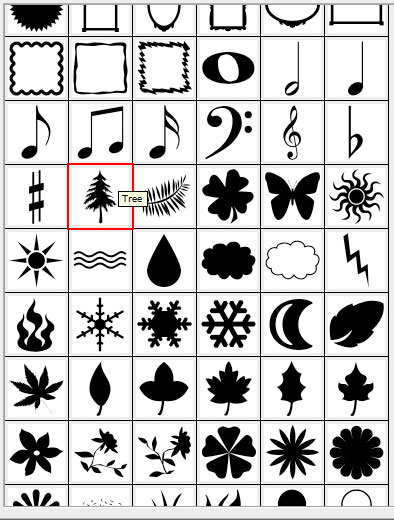
Next choose the Custom Shape Tool (U)
Custom Shape Tool (U).
 You use the shape tools to draw lines, rectangles, rounded rectangles, and ellipses in an image. In Photoshop, you can also draw polygons and create custom shape libraries to reuse and share custom shapes.
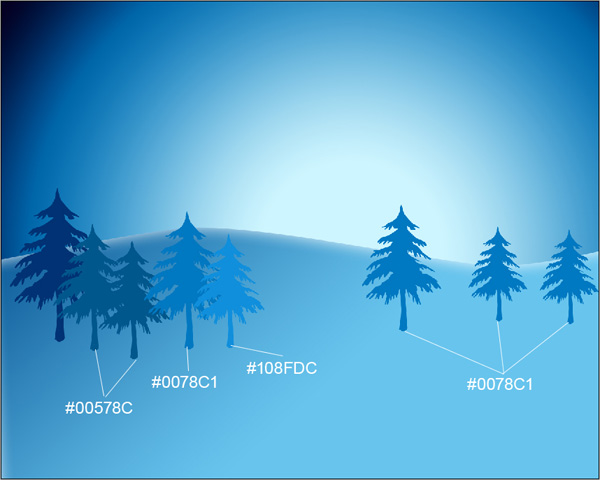
'); return false">Custom Shape Tool (U) and pick up a fir tree’s figure, having the color #003274

Make seven copies of the tree’s silhouette and select the Free Transform option to change the copies’ sizes, placing them the same way demonstrated below:
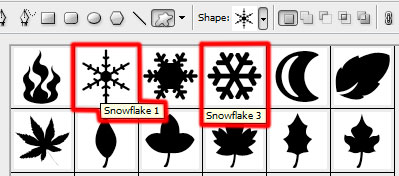
Using the Custom Shape Tool (U), let’s represent a lot of snowflakes, having different sizes:

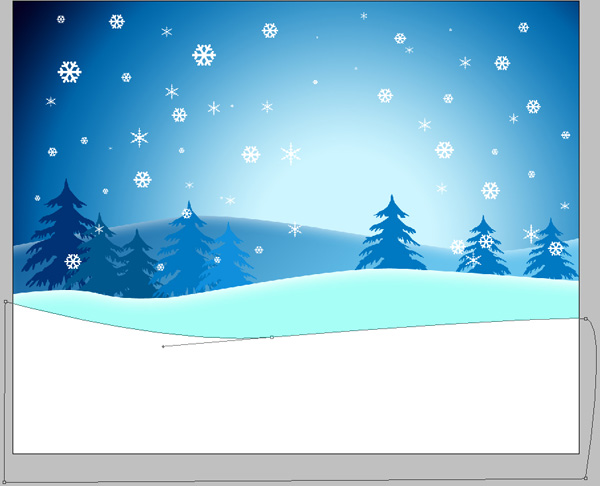
Continue representing the snow hills, selecting the same Pen Tool (P) and Convert Point Tool, having the color #A7FEF6
Creative christmas cards - part 2

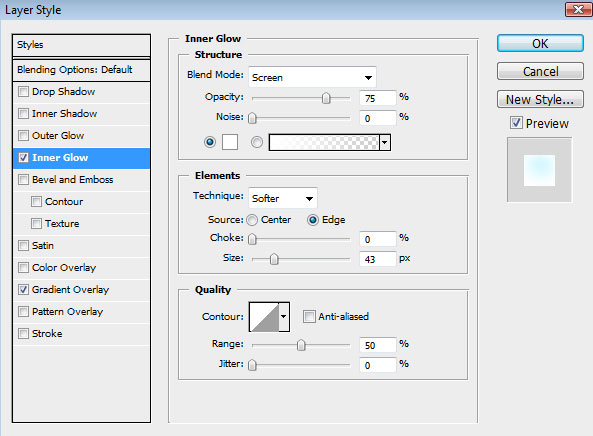
The layer’s parameters: Blending Options>Inner Glow
Blending Options>Gradient Overlay
Gradient’s parameters:

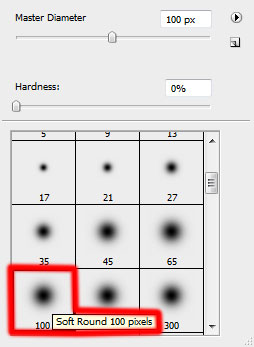
On a new layer (Create new layer) we’ll apply the standard Brush Tool (B)
Brush Tool (B).
 The brush tool is used for making good backgrounds and also on new layers they have different types so that you get a different effect with every brush you use.'); return false">Brush Tool (B) with the Opacity of 20% to represent the shadows on the snow hill.

Next we’ll apply the Ellipse Tool (U)
Ellipse Tool (U).
 Use the ellipse tool to draw ovals and circles. To draw a circle, hold down the Shift key while dragging. Double-click the ellipse tool to open the Color inspector.'); return false">Ellipse Tool (U) and represent a snow ball reserved for a snowman.
The layer’s parameters: Blending Options>Inner Glow
Blending Options>Gradient Overlay
Gradient’s parameters:

Make two copies of the layer containing the snow ball and select the Free Transform option to minimize the copies’ sizes, placing them as it is represented next image:

Applying the Ellipse Tool (U), it’s possible to draw the buttons on the snowman.

Creative christmas cards - part 3
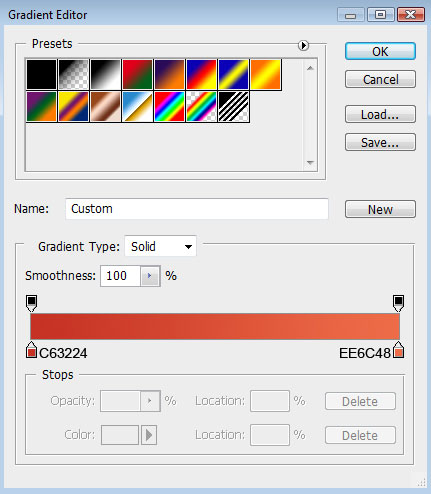
Blending Options>Drop Shadow

Blending Options>Gradient Overlay
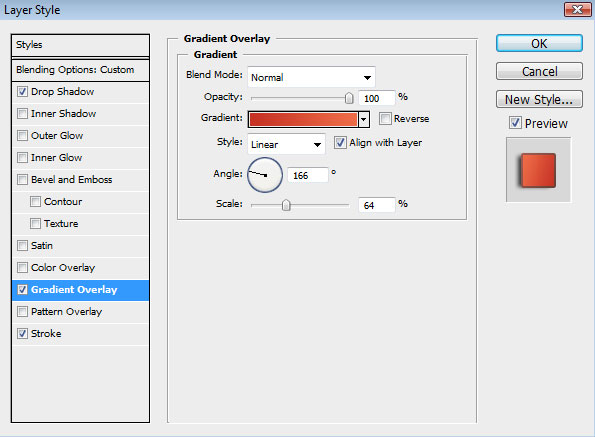
Gradient’s parameters:
Blending Options>Stroke
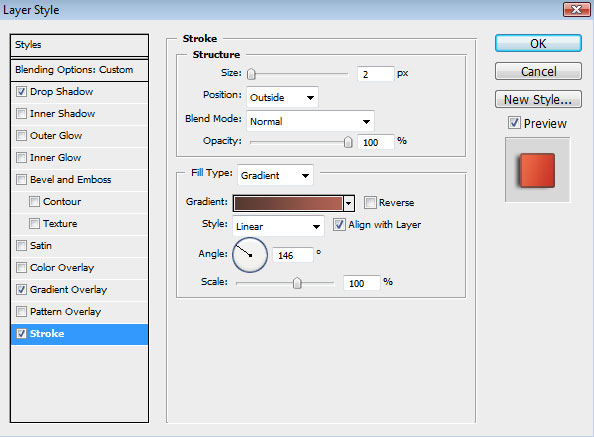
Gradient’s parameters:

Make two copies of the layer containing the button and choose Free Transform option to change the copies’ sizes, placing them the way demonstrated next picture:

Using the previous tool, it’s possible to draw next the snow man’s nose:

The layer’s parameters: Fill 0%
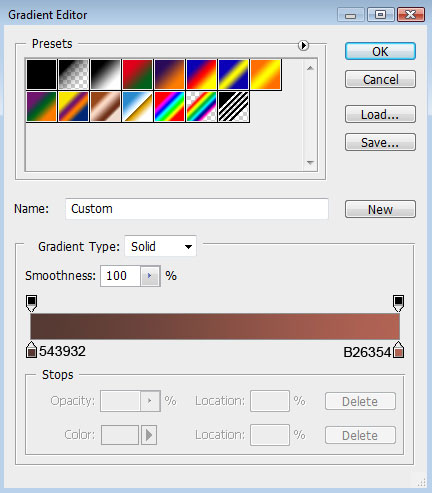
Blending Options>Inner Shadow
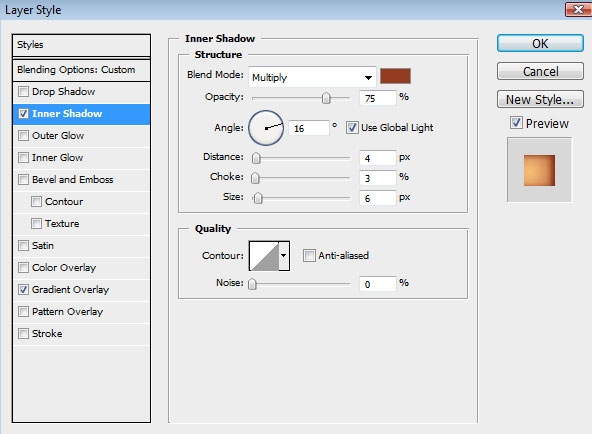
Blending Options>Gradient Overlay
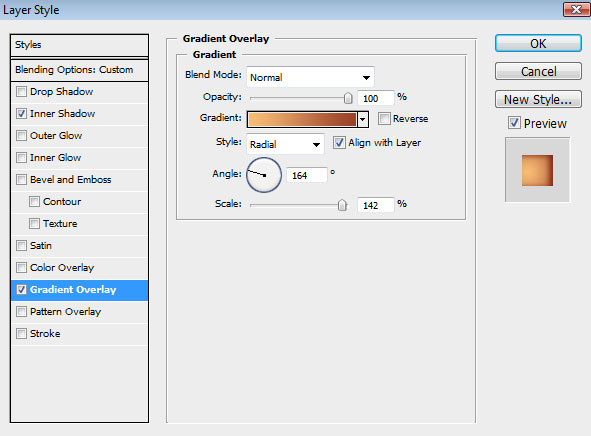
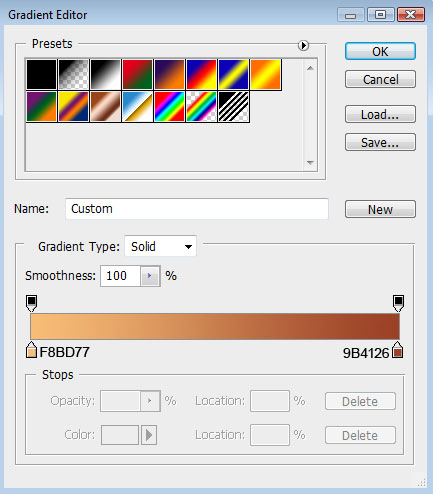
Gradient’s parameters:

Create a new layer and use on it a standard brush (Brush Tool (B)
Brush Tool (B).
The brush tool is used for making good backgrounds and also on new layers they have different types so that you get a different effect with every brush you use.'); return false">Brush Tool (B)) to draw the eyes and the mouth, belonging to the same snowman. The elements’ color is black.

Using the Line Tool (U)
Line Tool (U).
 The line tool is used to draw straight lines on the canvas. It is pretty intuitive, you simply choose the line tool from the toolbox, click once on the canvas to specify the beginning point of your line and then drag the mouse to define the line extending from the starting point.'); return false">Line Tool (U), it’s time to picture a twig that will represent the snow man’s arm. The color in this case is black too.

Put together all the layers composing the twig into a single layer. In this case we’ll press Ctrl button, mark out the twig’s layers and press then Ctrl+E. Next we’ll make a copy of the new layer that we got and apply Free Transform option to turn over the copy, make the copy smaller and put it on the picture the same way shown below:


The picture is finished!

Không có nhận xét nào:
Đăng nhận xét