Start working with creation of a new file (
File>New) that has
1024x768 px and
72 dpi.
Take next the
Rectangle Tool (U) to represent the background of the picture we want to have at the end of our work.

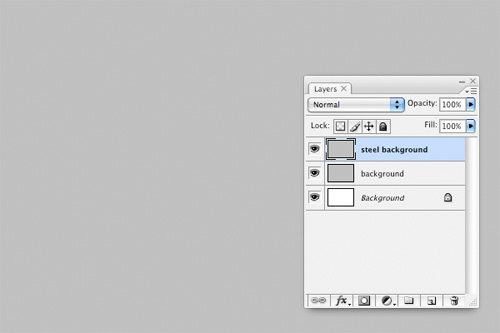
Select the next shown parameters by making a mouse click on the layer we work with on the layers’ panel:
Fill 0%
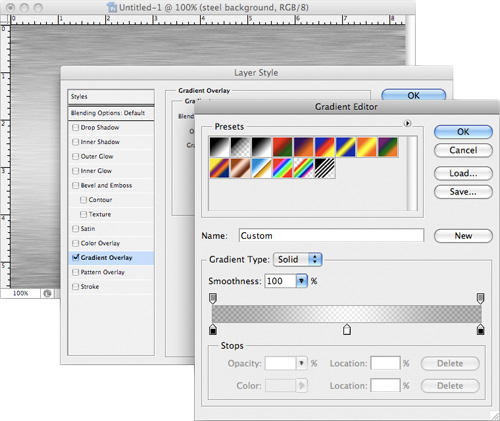
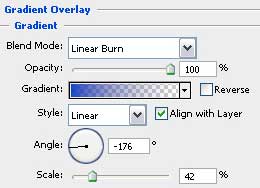
Blending Options>Gradient Overlay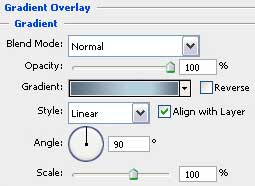 Gradient’s parameters:
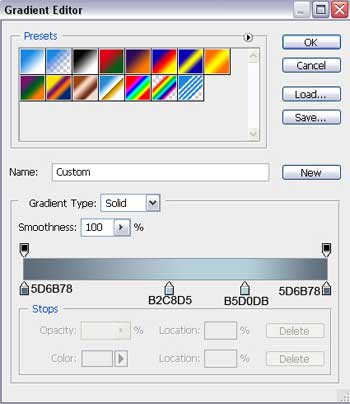

Select after that
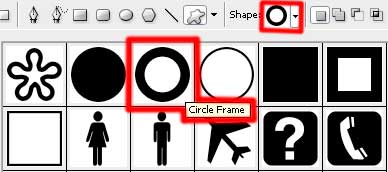
Custom Shape Tool (U)
Custom Shape Tool (U).  You use the shape tools to draw lines, rectangles, rounded rectangles, and ellipses in an image. In Photoshop, you can also draw polygons and create custom shape libraries to reuse and share custom shapes.
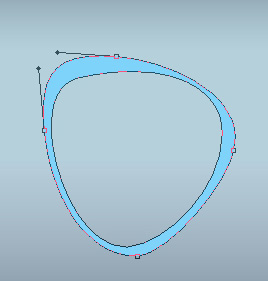
'); return false">Custom Shape Tool (U) to represent a circle frame which shape may be changed with the
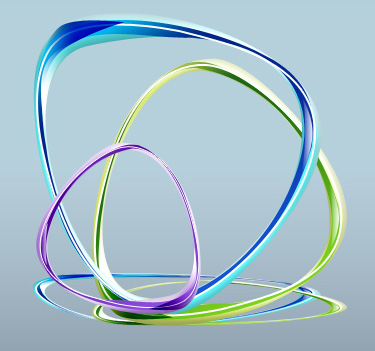
Convert Point Tool, getting the same result as the picture from below shows it:
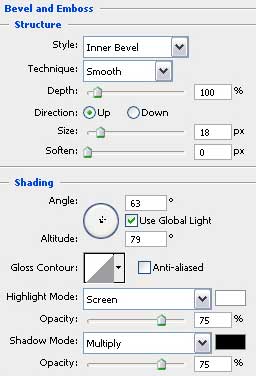
The layer’s parameters:
Blending Options>Inner Shadow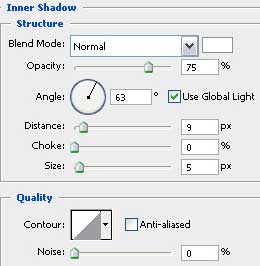 Blending Options>Bevel and Emboss
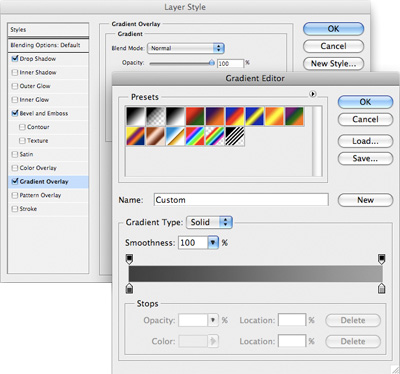
 Blending Options>Gradient Overlay
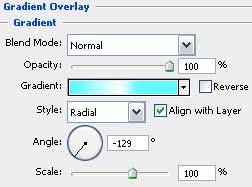 Gradient’s parameters:
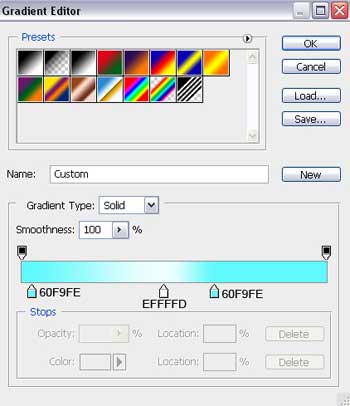
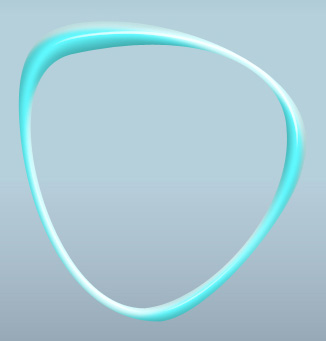
Make a copy of the last made layer and choose again the same tool,
Convert Point Tool, to make the corresponding corrections on the copy’s layer to get the result from below:

The layer’s parameters:
Blending Options>Gradient Overlay Gradient’s parameters:

Select now the
Pen Tool (P)
Pen Tool (P).  allows you to make lines that change colour and shapes on the project.'); return false">Pen Tool (P)
 to represent a flare on the picture, which shapes may be corrected again with the Convert Point Tool.

The layer’s parameters:
Fill 0%
Blending Options>Stroke


Using the last tools, it’s possible to draw a flare on the circle’s right side.

The layer’s parameters:
Fill 0%
Blending Options>Gradient Overlay Gradient’s parameters:

Select the previous tools,
Pen Tool (P) and
Convert Point Tool, to dark out the top part of the circle frame.

The layer’s parameters:
Fill 0%Blending Options>Gradient Overlay
 Gradient’s parameters:


Select again the same instrument mentioned above to represent another flare on the top part of the frame.

The layer’s parameters:
Fill 0%Blending Options>Gradient Overlay Gradient’s parameters:
 Combine in a group
 all the layers composing the circle frame (press
Ctrl button to mark out the corresponding layers and next we have to hold on the left mouse’s button for taking the marked layers on
Create a new group option).
Next make a copy of all the layers contained in the circle’s group (press again
Ctrl button to mark out the necessary layers and hold on the left mouse’s button for taking the marked layers on
Create a new layer selection).
Merge Down all the layers (press
Ctrl button to mark out the layers and press the combination of buttons
Ctrl+E). Using
Free Transform option it’s possible to change a little the new element that we got, placing it as below:

Make a copy of the earlier made group containing the blue circle. Use again the
Free Transform option (
Flip Vertical) to turn around the copy, making it a little smaller (by pressing
SHIFT button). We should also apply different parameters for the layers.

The parameters for the first layer:
Blending Options>Inner Shadow Blending Options>Bevel and Emboss
 Blending Options>Gradient Overlay
 Gradient’s parameters:
The parameters for the second layer:
Blending Options>Gradient Overlay
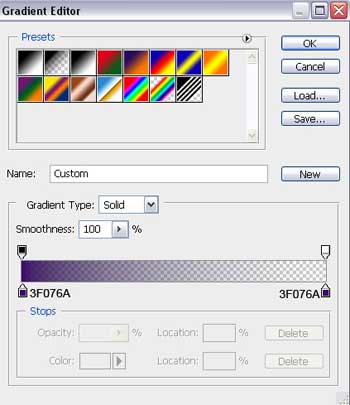
 Gradient’s parameters:
The third and the fourth layers should be left the way they are at the moment. The parameters for the fifth layer:
Fill 0%
Blending Options>Gradient Overlay Gradient’s parameters:
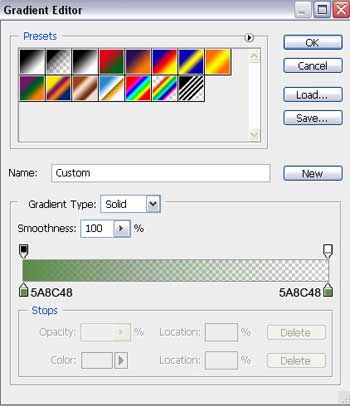
The sixth layer doesn’t need any change. Now, for our convenience, we shall
Combine in a group all the layers composing the green circle (press
Ctrl button to mark out the necessary layers and hold on the left mouse’s button when taking the marked layers on
Create a new group selection).
Using the method described earlier, make a copy of the layers composing the green circle.
Merge Down the copies layers and use the
Free Transform option to make the changes on the copies’ sizes and their placement.

Make a copy of the made group of the green circle. Choose again the
Free Transform option (
Flip Horizontal) to turn over the copy, make it smaller (by pressing
SHIFT button) and apply different parameters for the layers:
The parameters for the first layer:
Blending Options>Inner Shadow Blending Options>Bevel and Emboss
 Blending Options>Gradient Overlay
 Gradient’s parameters:
The parameters for the second layer:
Blending Options>Gradient Overlay
 Gradient’s parameters:
The parameters for the third layer:
Blending Options>Stroke

The fourth one doesn’t need changes on its parameters: The parameters for the fifth layer:
Fill 0%
Blending Options>Gradient Overlay Gradient’s parameters:
The parameters for the sixth layer:
Fill 0%
Blending Options>Gradient Overlay
 Gradient’s parameters:
 Combine in a group
 all the layers composing the violet circle (press
Ctrl button to mark out the necessary layers and then hold on the left mouse’s button to take the marked layers on
Create a new group selection). Now we have to make the same operations we did before and make copies of the violet circle’s layers, put the copied layers together and use
Free Transform option to make the necessary changes on their sizes and their placement on the picture.

Press again
Ctrl button to mark out the layers of the circles’ reflections (it should be a single layer) and then we have to press on
Ctrl + E to
Merge Down in a single layer. Select also the next parameters for the new result:
Filter>Blur>Gaussian Blur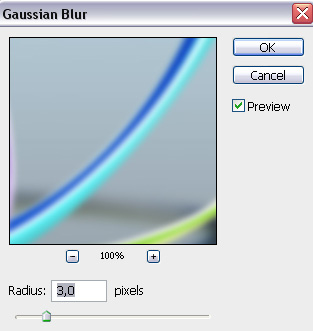

Press on the same layer the combination of buttons from here:
Ctrl +U

Finished!